Wednesday, December 7, 2011

A quick cooking video

For those of you who wonder what's actually taking place in the kitchen when I'm cooking, here's a little window into the "experience" (if we can call it that). :)

And for the record: (1) it's running at 4x speed, (2) this doesn't show the process in its entirety and there is prep for several dishes taking place, and (3) the finished product looked better than the final picture -- that was the chef's portion (read: ugliest piece)

Oh, also, the Japanese-style knives shown in the video are hand forged by me.


Sunday, April 3, 2011

Tea-Leaf-Smoked Stuffed Duck Breast with Brown Tarragon Sauce

Finished duck with a foie gras risotto


I'll preface this narrative by saying that this is definitely NOT a cheap or easy dinner solution. It requires some specialized equipment, a lot of time, top quality products, plenty of patience, and some luck. If you're lacking any of those things, I don't suggest you try to replicate this dish. That having been said, if you do have the time, patience, and wallet for it, this dish is a terrifically yummy dinner with some wonderfully complex flavors working.

So, without further ado...


Ingredients
Equipment Needed
 2-4 Boneless Duck Breasts
12 inch Cast Iron Grill pan
1 Handful of Pistachios, shells removed
10 inch Non-Stick Fry pan
½ Lb Andoule Sausage, casing removed, chopped
Stovetop Smoker unit
8 Black Tea Leaves, whole
Fillet knife, razor sharp
1 tsp Applewood shavings
8-10 inch Chef’s knife, razor sharp
½ C Dry White Vermouth
Oven with broiler setting
4 sprigs Tarragon, 1 whole, 3 finely chopped
2 ½ quart saucepan with lid
5 Tbs Unsalted Butter, room temperature
Food processor
Salt and Pepper, to taste
Strainer


Method:

 
  1. Rinse and pat dry the duck breasts
  2. Lay the duck skin-side down, then butterfly to create a pocket for the stuffing
  3. Salt and pepper the inside of the butterflied cavity
  4. In a non-stick fry pan, add  the sausage. Cook on medium-high heat until browned on all sides. Remove sausage, reserving the fat and oils for later. Allow the sausage to cool to room temperature (to ensure that the heat from it does not begin to cook the duck when you stuff it)
  5. Add the pistachios into your food processor, then pulse until very finely ground. Remove and sprinkle inside the duck pocket. 
  6. Add the sausage on top of the layer of pistachios. Close the pocket, then tie the duck closed (in the same way you would tie a roast, more or less)
  7. Score the fat cap/skin of the duck, to prevent the skin from curling during the cooking process.
  8. Inside your Stovetop smoker unit, add the tea leaves, wood chips, and about 1/4C of water. Then place the duck breasts on the smoking rack. Heat the unit on medium until smoke/vapor begins to appear. Close the top securely and smoke on medium-low for 30-40 minutes. DO NOT OPEN to inspect or you will increase cooking time and let your smoke escape!
  9. Once the smoking process is done, scrap what remains on the drip pan into the pan with the sausage drippings. Add one large sprig of tarragon and allow it to infuse (no heat).
  10. Pre-heat your Cast Iron grill pan for about 5 minutes on the highest heat setting you have. Do not add oil or butter. The duck fat will do most of the work for you, as duck is a very fatty/oily meat.
  11. Sear the duck for about 3-4 minutes per side, basting with the accumulated juices. Meanwhile, preheat your broiler to "high" and place the cooking rack in the middle position.
  12. When done searing, drain the juices from the pan and transfer it to the broiler. Keeping a watchful eye, place the pan and its contents in the oven for about 10 minutes, being careful not to let the skin burn. Ideally, you want it to crisp and become brown, but not be charred. 
  13. ***Be sure that the internal temperature of the duck reaches at least 150 degrees before you serve it. Food safety is key here! (Typically poultry is served at no less than 165 degrees, but duck can be served slightly more rare than chicken, for example.)
  14. Meantime, combine all the drained fats, juices, minced tarragon, and white wine in your saucepan. Bring it to a boil, while covered, then remove the cover and reduce to a proper sauce consistency. Place the result in the food processor and pulse until it is very smooth. 
  15. Strain the sauce, removing any lumps or pieces. Then, off the heat, add 2-3 Tbs of butter. Whisk in the butter to thicken the sauce. Set aside to thicken. 
  16. When done, remove the duck from the broiler and cut off the string. Let the meat rest 10 minutes
  17. Ladle a small amount of the sauce over the duck. Garnish with fresh tarragon leaves. Serve and savor your victory!

And the final steps...(searing and then, the oven with a little butter)


Saturday, March 26, 2011

Carrot-Cake French Toast with Maple Pecan Syrup and Fresh Fruit


I know, this one probably sounds a little odd. Okay, completely random. But trust me, it's amazing.  I would love to take full credit for its creation, but I can't. I got the idea of using cake from an article I read online, but they specified a different variety and a different method of cooking it. I happen to adore carrot cake; I asked my mom to make it every year for my birthday when I was little. Naturally, this seemed like the next logical progression.

So, here's how you make one of the more awesome breakfast/bruch dishes I've eaten...

Ingredients:

(For the cake)
Just a few basics...
  • 4 eggs
  • 1 1/4 cups vegetable oil
  • 2 cups white sugar
  • 2 teaspoons vanilla extract
  • 2 cups all-purpose flour
  • 2 teaspoons baking soda
  • 2 teaspoons baking powder
  • 1 handful raisins, simmered off in dark rum and drained
  • 1/2 teaspoon Kosher salt
  • 2 teaspoons ground cinnamon
  • 1 teaspoon ground nutmeg
  • 1/2 teaspoon ground cloves
  • 3 cups carrots, peeled and grated
  • All mixed up
  • 1 cup chopped pecans
(For the French Toast batter)
  • 2 eggs
  • 2/3 cup milk
  • 1/2 teaspoon ground cinnamon
  • 1/2 teaspoon ground nutmeg
  • 1/4 teaspoon ground cloves
Method:
  1. Preheat your oven to 350 degrees
  2. Place raisins in a fry pan. Add dark rum and turn on heat to its lowest setting, being careful not to ignite the liquid. Reduce, then strain out the raisins. Set aside.
  3. Mix wet and dry cake ingredients, adding raisins, in an electric mixer. Mix until well combined. Do not over mix. 
  4. Grease a bread pan and pour in cake batter.
  5. Bake for approximately 45-60 mins until done. If anything, err toward overcooking the cake. The French Toast batter and cooking process will rehydrate it to some degree. 
  6. Remove and allow to set for 10-15 minutes before removing from the bread pan to cool. Allow to reach room temperature before slicing. 
  7. Slice into 1" thick slices, similar to Texas Toast. 
  8. Baked and resting
    Combine French Toast batter ingredients, beat together well until combined. 
  9. Preheat your pan to medium-high heat. Pan should be a non-stick variety and sprayed with Pam or other manner of non-stick spray.
  10. Lightly soak each slice of cake in the French toast batter, then place gently into the pan. Cooking shouldn't take longer than 3 minutes per side, if heat is properly adjusted
  11. Remove. Top with confectioners sugar, sliced strawberries, maple syrup, and crushed pecans. As much or little of each as desired. 
  12. Serve
Finished baking, time to slice and cook... again...


Sunday, March 20, 2011

Beef Wellington


Finished Beef Wellington
I've watched more cooking shows that star Gordon Ramsay than I care to count. Despite his profanity-laced tirades, you have to admit that he's one hell of a chef. The man holds more Michelin stars than any other chef. To that end, I've decided to do my own interpretation on one of his classic dishes -- the Beef Wellington.

No one knows why it's called "Wellington" or where the dish came from. It didn't appear in cookbooks until the 1960s, so I seriously doubt it is named after the Duke of Wellington. But I digress.

On Ramsay's show, "Hell's Kitchen," the Wellington seems to be the most regularly botched dish by his teams of chefs. Naturally, I took that as a challenge and went for it! Here's how I went about it, and what you need...
Wellington, just before slicing

Ingredients
  • 2 1/2 pounds beef tenderloin
  • 2 tablespoons butter, softened
  • 1/2 cup sliced fresh mushrooms
  • 1/2 lb of mushrooms
  • Pistachios, shelled
  • 1 package prosciutto
  • salt and pepper to taste
  • 1  package frozen puff pastry, thawed
  • 3 egg yolk, beaten
  • 1 (10.5 ounce) can beef broth
  • 2 tablespoons red wine

Most recipes I've run across call for a liver pate, which is difficult to find. So, I decided to make something of a pate consistency, but with much greater depth of flavor -- not to mention it sounds more appealing than liver to most people. It wound up being a combination of pistachios and mushrooms, pulsed to the proper consistency in a food processor, then sauteed dry to remove excess moisture.

Method
  • Preheat oven to 425 degrees. Place beef in a small baking dish, and spread with 2 tablespoons softened butter. Bake for 10 to 15 minutes, or until browned. Remove from pan, and allow to cool completely. Reserve pan juices.
  • Saute pistachio/mushroom pate in a non-stick pan for 5 minutes. Do not add butter or oil. Remove from heat, and let cool. The idea is to help remove the moisture from the mixture while intensifying the flavors. 
  • Mix together pate and 2 tablespoons softened butter, and season with salt and pepper. Spread pate over beef. Then wrap with proscuitto. 
  • Roll out the puff pastry dough, and place beef in the center. Egg wash all areas which will be seams to help bond the dough together. Fold up, and seal all the edges, making sure the seams are not too thick. 
  • Place beef in a 9x13 inch baking dish, score the top of the dough without cutting all the way through (using sm. paring knife), and brush with egg yolk. Sprinkle the top with a bit of rock salt, if desired.
  • Bake at 450 degrees for 10 minutes, then reduce heat to 425 degrees  for 10 to 15 more minutes, or until pastry is a rich, golden brown. Set aside, and keep warm.
  • Place all reserved juices in a small saucepan over high heat. Stir in beef stock and red wine; boil for 10 to 15 minutes, or until reduced. Strain, and serve with beef.

Sunday, February 20, 2011

Curried Thai Stir Fry


I keep hearing about curry. Curry this, curry that, curry everything. Apparently Indian-style curries are becoming increasingly popular. Same goes for Thai food -- another of the "new" in things. Those of you who know me know that I'm not what you would call "trendy", but I couldn't resist... I combined Thai and Curry together as best I could and this dish was the result.

Now, when I cooked this, I used about 8 times the amount of pepper flakes listed in the recipe below. I figure that Thai food is supposed to be hot, so I took it up a notch. If you're sensitive to spices, just use the amount specified in the recipe and you'll be just fine.

The prep time is really where most of your time will be spent if you make this; a lot of chopping, dicing, etc. The actual cooking time is very short. Taste-wise, I was very happy with the outcome. I have yet to find a good presentation for stir-fry -- it's bright and colorful with a beautiful texture, but you really can't serve it in an elegant fashion.

Ingredients

Stir Fry Sauce:
Chicken simmering in my curry sauce (step 5)
  • 1/2C Low Sodium Chicken Broth
  • 2 tsp Corn Starch
  • 1 1/2 tsp Curry Powder
  • 2 tsp Soy Sauce
  • 1/8 tsp Red Pepper flakes
  • Juice of 1 lime
  • 1 1/2 Tbs Fresh Grated Ginger
  • 1 Tbs Hoisin
  • 2 Tbs Sesame Oil

Veggies, etc:
  • 3 Green Onions, thinly sliced
  • 2 cloves of Garlic, minced
  • 2C Broccoli florets
  • 1 Green bell pepper, diced
  • 1 Red bell pepper, diced
  • handful of Sweet peas (in pod)
  • 2/3C carrots, halved and shaved thinly
  • 1 1/2 tsp Olive Oil
  • 6 oz Boneless, skinless chicken breast, roughly cubed
  • 1 bunch of Watercress leaves
Method
  1. Stir together the sauce ingredients; set aside.
  2. Heat a non-stick wok over medium-high heat. Add onions and garlic. Cook for 1 minute, then remove and set aside.
  3. Add other veggies to the wok (except the watercress). Stir fry for 2-3 minutes, until heated through. Then remove and set aside. 
  4. Add olive oil to the wok and increase heat to high. Add chicken and cook until no longer pink. 
  5. Stir in the sauce. Allow it to reduce for about a minute. Then, after tossing, add veggies, onion, and garlic back into the wok. 
  6. Stir fry another 2 minutes on high, tossing regularly. 
  7. Turn off heat, then top with watercress and lime juice. (remove from the pan to avoid wilting the watercress, like I did)
  8. Serve (on Herbed Jasmine Rice, optionally)


Served with the Herbed Jasmine Rice

Tuesday, February 15, 2011

Sensational Shrimp Scampi


Finished shrimp scampi
Easiest seafood dish. Ever. Seriously. And yet, this is fun to make and looks impressive if you throw in a few little tricks for pizazz...

I had been craving seafood for a couple of weeks and finally got around to deciding what to make. Prior to making this, I had never deveined or shelled a shrimp. Once I figured out how to do that, the rest was a piece of cake. I looked around for different recipes and combined some of the things I liked from each; then I did what I usually do -- wing it. The result was pretty kick-ass!  Here's how I did it:

Ingredients
  • 1 1/2 pound jumbo shrimp, shelled and deveined
  • Kosher salt and freshly ground black pepper
  • 2 Tbs unsalted butter
  • 2 tsp minced garlic
  • 1/4C dry white vermouth
  • 1/4C dry white wine
  • 1/2 tsp Oregano, crushed
  • 1 shallot, brunoised
  • 3 Tbs Brandy
  • 1 Tbs freshly squeezed lemon juice
  • 2 tsp finely chopped flat-leaf parsley leaves
  • 1/4 tsp grated lemon zest
Method


Step 5 - Flambe! Do ya feel lucky?!
  1. Melt butter in a large saute pan over medium heat. Once the foaming has abated, increase heat to high and add shrimp all at once, making sure each one is in full contact with the base of the pan. Season with salt and pepper (more than you would normally use)
  2. Sear for about a minute, then add the garlic, beginning to stir everything together with tongs. Cook about another minute, then start flipping the shrimp.
  3. Add the vermouth and white wine, slowly. Keep the heat high and allow it to reduce for around a minute. 
  4. Squeeze in lemon juice, oregano, and fine diced shallot,  then add the zest. Stir, then flip the shrimp, making sure the liquid has a chance to coat all surfaces of the shrimp. Allow to cook another minute or so.
  5. (Now here's the tricky/ flashy part)   Add the brandy. As you begin to smell it boiling up and see thin, gray vapors rising from the pan, light a match and wave it quickly through the vapors, thus igniting it (flambe!!) 
  6. Lightly shake the pan contents about without spilling. Continue to do this until the flames die down. 
  7. Add the flat leaf parsley, then take your pan and put it under a hot broiler for 1.5-2 minutes to finish. 
  8. Season again (lightly) with salt and pepper
  9. Serve.
Trust me, the flambe part of this dish is pretty awesome! I don't know why, but it's just impressive looking and people tend to really like it. The brandy is a subtle flavor, if done properly, but it helps to scale back the sharpness of the lemon and vermouth into a much deeper, richer sauce. Just don't burn yourself or reduce your house to ashes trying to flambe if you're not confident you can pull it off -- just let the alcohol cook off the traditional way, if you'd rather; it only takes an extra minute or two.

I promise, making this recipe at home tastes better than the mass-produced, butter-laden dish of greasy decapod crustaceans served as "shrimp scampi" at most chain restaurants. Not to pat myself on the back or anything... 

Sunday, February 13, 2011

Anti-Valentine's-Day Chocolate Peanut Butter Cups

White chocolate and "dirty tuxedo" peanut butter cups

This year, I'm boycotting Valentine's Day. I'm not in the spirit. The only thing I will miss is all the chocolate, even though I'm not generally the one receiving it. So, not being one to deprive myself, I decided to make some chocolate. And not just any chocolate, but chocolate peanut butter cups. 

Beginning the tempering process
Last time I tried to make chocolate peanut butter cups, they came out like a chocolate cow turd. I didn't temper the chocolate properly and used a mold that was way too big. So, as always, I started researching the chocolate making process, endeavoring to find what I had done (or not done) wrong. As it turned out, my mistakes were pretty small, but made a huge impact on the final product.

I went to a local restaurant/bakers' supply and picked up a candy thermometer, along with a smaller mold. You see, the trick to making chocolate "snap" when broken and hold its shape is called "tempering."
Beautifully tempered chocolate
For an in-depth breakdown on what tempering is or how it's done, click here. Long story short, you slowly heat the chocolate in a double-boiler until it reaches about 110-115 degrees. You then cool it to around 95-100 degrees. Never EVER should your chocolate be heated above 130 degrees, which causes scorching and disgusting tasting mucky chocolate. Trust me, I know first hand. You'll note the thermometer in the photo above-- very necessary item.

I also picked up a piping bag, commonly used to apply frosting to cakes and such. I set one bag up with my tempered chocolate and the other with some peanut butter. Simple enough, right?

So here's how it went down:

Peanut butter added to mold

  1. Temper chocolate
  2. Pipe small amount of chocolate into the base of each mold
  3. Allow it to set in the freezer for about 5-10 mins
  4. Pipe in peanut butter, making sure it stayed relatively flat and in the center of the mold
  5. Pipe chocolate on top
  6. Allow it to set in the freezer for 10 minutes
The first batch came out terrific and I was feeling motivated, so I decided to make a couple of other kinds: white chocolate with semi-sweet drizzle and "dirty tuxedo." The dirty tuxedo consisted of a dark chocolate base, white chocolate top, and a butterscotch drizzle. 

Needless to say, I was feeling pretty accomplished! I mean really, how many guys do you know who actually make (not "buy" but "make") chocolate for you on Valentine's Day?! 

Answer:  None. They're not for Valentine's Day and they're not for you! They're Anti-Valentine's chocolates!  ;)


Saturday, February 5, 2011

Chicken Breast with White Wine Cream Sauce and Capers


Man, I am getting really bad about updating this blog - partially due to pure, unadulterated laziness and partially because I was beginning to wonder if anyone was reading this thing. But, nonetheless, I'm back. I've been cooking up a ton of new dishes and I felt the need to share this one with you. Usually, I hate cooking chicken. Something about it just screams "bland" to me as I'm passing it by in the supermarket. Today something compelled me to overcome my prejudice and come up with something yummy.

Every so often when I'm watching Food Network or Cooking Channel, I see a recipe which includes capers. I had a vague idea of what capers were, but I had never used them. Apparently, they're used regularly in Southern Italian and Greek cuisine. Capers, as we know them, are actually the buds of the "Capparis spinosa" plant (or "caper bush"). They're often pickled and tend to taste rather salty and tangy. I figured I'd head on down to Trader Joe's and pick some up to see for myself.

After systematically scouring the entire store, isle by isle, I finally found my capers. Next to nuts and legumes. What kind of sense does that make?! But I digress...

Next, I had to think of a good way to incorporate these lovely little buds into a dish. As I was pondering, I thought of a dish I'd enjoyed a while back in a French Continental restaurant near Old Fair Oaks -- a marinated chicken breast with a gorgeous white wine sauce. Having never made a white wine sauce, I decided to give that a shot as well and throw some capers into it for good measure. I've seen a lot of watery-looking white wine sauces/reductions, so I decided to toss in some heavy cream toward the end to thicken it up and lighten the color. Here's that I came up with...

Floured up and ready to go!
Ingredients
  • Salt and cracked black pepper, to taste
  • 1/2 cup all-purpose flour
  • 4 (6 ounce) skinless, boneless chicken breast halves (I used free-range organic)
  • Extra Virgin Olive Oil, enough to cover the base of your saute pan 1/4" thick
  • 1 cup dry white wine
  • 1/2 cup heavy cream
  • 1/8 cup lemon juice
  • 1/4 cup cold unsalted butter, cut into pieces
  • 4 tablespoons capers, drained
  • Several large sprigs of rosemary
Method
  • Combine flour, salt and pepper on a medium sized plate. Coat all sides of each chicken breast, then shake off excess.
Sizzling away...
** Optional:  You could, if so inclined, marinate the chicken overnight in something which would compliment the sauce's flavor profile. I'd recommend making it this way to start off, then branch out once you've tasted it. 
  • Heat olive oil in a saute pan over medium-high heat.
  • Add chicken and brown 4-5 minutes per side. Then remove, place on sheet tray, and add to 300 degree oven. Bake until internal temperature reaches 165 degrees. (Food safety first here, people!)    Meanwhile...
  • Add white wine (slowly!) into the hot saute pan to deglaze (pulls up those little, brown flavorful bits). Add lemon juice and one whole sprig of rosemary into the liquid. Increase to high heat, then allow to reduce by about half. 
Reducing...
  • Add the butter, stirring until fully incorporated (to avoid it separating). 
  • Reduce heat to medium, then add capers, continuing to stir quite regularly. After about 2 minutes, then reduce heat to low/simmer and add cream. Remove the rosemary sprig and discard. 
  • Stir often, allowing mixture to reduce until desired consistency is reached. Allow sauce to cool for about 3-5 minutes. 
  • Plate the chicken, then spoon sauce over the breast. Garnish with small rosemary sprig and lemon zest.
  • Serve and devour.
Hope you enjoy! It's actually a lot simpler to make than it sounds. Trust me on this one, it's worth it.  

Sunday, December 19, 2010

Zuppa Tuscana

After a recent visit to the Olive Garden, my dad reiterated his affinity for their "Zuppa Tuscana." Every time we go there, he orders it. Without fail. Every time. I've been dabbling in soups for a bit, so I thought I'd try to recreate their soup recipe and see how it went.

As per usual, I went online to do some research. There were a plethora of custom variations available, but none seemed to be "dead on," so to speak. So I did what I usually do: take my favorite parts of each recipe, combine them, then add my own touches.

My variation on the recipe itself is remarkably simple and inexpensive to make. Since I'm a huge fan of outdoor cooking, I decided to make this entire recipe in my camp-style Dutch oven out on the patio. I think it adds an extra dimension of flavor that you really can't get any other way. I have, however, prepared the instructions for traditional indoor equipment.

Anyway, without further ado, here's what you need to do to recreate my version of this well-known and well-loved soup.

Ingredients
(1) 16 oz package Smoked Zesty Italian sausages
2 Potatoes, cut into 1/4 inch pieces
3/4C Chopped Onion (sweet, preferably)
1 Tbs white sugar
6 Slices Applewood-Smoked Bacon
1 1/2 tsp Minced Garlic
2C Kale/Spinach (spinach, in my case; more readily available), washed and shredded
2 Tbs Chicken soup base/bullion
1/8C beef stock
1 Quart water
1/2C Heavy Whipping Cream
1 Tbs Italian seasoning
1/4 tsp Black Pepper
Pinch of Kosher salt

Method

  • Preheat oven to 300 degrees
  • Place sausage links onto a baking sheet, then bake for 25 minutes
  • Cut cooked sausage in half lengthwise, then into 1/2 inch slices
  • Place onion and bacon slices in a cast-iron pan, then cooked over medium heat until onion is almost clear
  • Remove bacon and crumble, then set aside. Then add sugar to onions. Stir until it absorbs, then remove from heat.
  • Add garlic to onions, cook one additional minute. Add chicken soup base, water, and potatoes. Simmer for 15 minutes.
  • Add crumbled bacon, sausage, kale, and heavy cream. Simmer another 5 minutes.
  • Serve hot
And there you have it. My folks and I ate the entire pot of this terrific soup within the first hour it was done. We all had seconds. Hope you will too!

Garlic and Rosemary Roasted Rack of Lamb

I've been intrigued by "rack of lamb" for quite some time now. I remember seeing photos of the crown roast, whether it was pork or lamb, gracing the cover of cookbooks many times over. Consequently, I've been wanting to see if I was up to the challenge. Now, after a day of preparation and roasting, I feel like I have conquered one of the most classic roasts out there.

It began, simply enough, with a trip to the Orangevale Meat Shoppe. I paced the length of the counter several times over, hoping that something would inspire my next cooking binge. And there it was -- rack of lamb. Granted it was expensive, but I had some money in my pocket and it seemed as good a time as any.

From what I've read and heard from others, this sort of dish is generally reserved for certain special holidays and other rare occasions. In my mind, Sunday dinner seemed like a perfectly fine excuse. And so, I bought two racks. After all, you really need two, if for nothing other than the sake of presentation.

Once I got home, I began by gathering my ingredients and doing some basic prep work. Since it was the night before, I decided to open the packages and do some basic seasoning, then seal everything back up to absorb flavor overnight. First, I rubbed on a light coat of Extra Virgin Olive Oil. I coarsely chopped some fresh garlic and rosemary, then pressed it into the outer portion of the meat. Then into Foodsaver bags they went, with the intention of sealing in some additional flavor while marinating.

So, the following day, it was roasting time. I gathered some ingredients and got started.

Ingredients
1/2 cup fresh bread crumbs
2 tablespoons minced garlic
2 tablespoons chopped fresh rosemary
1 teaspoon salt
1/4 teaspoon black pepper
2 tablespoons olive oil

1 (7 bone) rack of lamb, trimmed and frenched
1 teaspoon salt
1 teaspoon black pepper
2 tablespoons olive oil
1 tablespoon Dijon mustard


Method
Ready to roast
  1. Preheat oven to 450 degrees. Move oven rack to the center position.
  2. In a large bowl, combine bread crumbs, garlic, rosemary, 1 teaspoon salt and 1/4 teaspoon pepper. Toss in 2 tablespoons olive oil to moisten mixture. Set aside.
  3. Season the rack all over with salt and pepper. Heat 2 tablespoons olive oil in a large heavy oven proof skillet over high heat. Sear rack of lamb for 1 to 2 minutes on all sides. Set aside for a few minutes. Brush rack of lamb with the mustard. Roll in the bread crumb mixture until evenly coated. Cover the ends of the bones with foil to prevent charring.
  4. Arrange the rack bone side down in the roasting pan. Roast the lamb in preheated oven for 12 to 18 minutes, depending on the degree of doneness you prefer. With a meat thermometer, take a reading in the center of the meat after 10 to 12 minutes and remove the meat, or let it cook longer, to your taste. Let it rest for 5 to 7 minutes, loosely covered, before carving between the ribs.
I opted to roast the meat until it read 125 degrees internal. After resting, it had reached a perfect medium rare. I sliced between the ribs and served. Delicious. 

Tuesday, November 23, 2010

Cinnamon Rolls -- From Scratch!


After receiving a dutch oven for my birthday, I've developed a mild obsession with it. I'm cooking, baking, grilling, simmering, and roasting every and anything I can fit inside it. Truly one of the great cooking inventions.

Anywho... with the weather being dreary and drizzling such as it is, I felt like a batch of cinnamon rolls sounded like a solid plan. But not those store-bought "unwrap and bake" types -- from scratch and 100% homemade. I searched around the internet for something like 15 minutes before finding a suitably light dough recipe. For most dishes, it only takes me a minute or two to find a good "jumping-off point" recipe; finding one for cinnamon roll dough was quite an undertaking!

When I had settled on a good basic premise, I began modifying the dough and filling recipes. It took me two batches until the memory of cinnamon roll taste I had in my head matched the taste of my food. I made more for my co-workers and family, all of whom said it was utterly divine. Here's what I came up with...

Method

First, heat 3/4C of milk to between 120 and 140 degrees. Then mix in 1/4C of softened butter until it is fully melted. Set this aside and begin mixing the dough ingredients.

Dough:
Bubbling away in the Dutch Oven
  • 3 1/4C Flour
  • 1/2C sugar
  • 1/2 tsp Salt
  • 1/4C warm water
  • 1 package active yeast
  • 1 large egg, beaten
  • 1 tsp cinnamon
  • Butter solution mentioned above
** Note:  only add 2 1/4C of the flour while you're first mixing the ingredients together. Once it begins to form into dough, then add the remaining cup of flour a little at a time. Then cover the dough with a damp cloth for about 10 minutes to let it rise.

While the dough and yeast are doing their thing, start making the filling.

Filling:

  • 1C Brown Sugar
  • 1/2C Softened Margarine
  • 1/4 tsp Ground Cloves
  • 1 TBS Cinnamon
  • 1/8 tsp Almond Extract
  • 1/2 tsp Nutmeg
  • 10 drops Pure Vanilla Extract
Mix those items together rapidly to create a paste-like consistency. Use a rolling pin to spread the dough flat on a floured board, then spread the filling material evenly across the surface. Roll the dough, then slice across the width of the roll (about an inch wide per slice). Then place in a pan. 

I chose to bake these rolls in a Dutch Oven. If you decide to use a traditional oven, bake at 375 degrees. It should take around 20-25 minutes for the cinnamon rolls to be done. 

When done, remove the cinnamon rolls from the pan and brush any remaining filling material across the top. Another good alternative would be a cream cheese frosting (like this), depending on your personal preference. 

Enjoy! 

Sunday, November 14, 2010

Plank-Grilled Salmon Fillets + Side Dishes


While checking out a local meat shop, I got the urge to buy some salmon and make a new twist on a classic dish. So, I picked up a couple pounds worth of salmon fillets and headed home. 

I opted to grill the fillets on alder planks, available at most supermarkets or at the Fair Oaks Hardware store here locally. Generally cedar and alder are the two woods most commonly chosen for smoking fish, with cedar being the more aromatic of the two.

The process to make this particular entrĂ©e is fairly simple, but takes a bit of time to complete.

Method:
Ready to serve
  1. Marinate salmon in a solution of white wine (your choice), lemon pepper, sage, tarragon, and dill. Generally 2-4 hours.
  2. Soak wood planks in water for at least one hour
  3. Lightly blacken the planks on each side over a medium-hot grill
  4. Place fillets on the planks, cover with a thick layer of brown sugar
  5. Close the grill and cook at 350-400 degrees until lightly opaque
  6. Serve and enjoy!

For a healthy and easy side dish, I thought of grilled asparagus -- super easy to make and grills quickly. 

Grilled asparagus:
  1. Trim off the thickest bottom portions so all stalks are of equal length
  2. Peel the lower 2 inches, removing the tough, fibrous material
  3. Lightly coat in olive oil
  4. Salt and pepper to taste
  5. Grill over medium-high heat until asparagus becomes tender, but still holds shape (not soggy and bendy like a noodle)
  6. Spray with a light balsamic vinegar, then serve.

Once those two were done, I whipped up some sweet potato fries. Just peel and cut your sweet potatoes into  wedges, coat in oil and rub in spices. I used only salt, pepper, and brown sugar. Then grill hot until crispy. How's THAT for a piece of cake, eh?


Simple. Tasty. Done.  

Sunday, November 7, 2010

Pecan Marinade-Injected Pork Loin

Done and ready to slice!
Why must it always rain when I decide to cook?!

Weather notwithstanding, I went ahead and fired up the grill. And boy, am I glad I did! This recipe came out phenomenally well and, naturally, I just had to share it with you. The best part? It's easy and low-maintenance.

I began by picking up a pork loin from Costco. This thing was huge! Since I only needed to feed 3 people, I prepared just 1/4 of the loin. I vacuum-sealed and froze the rest for another day.

So, first things first... In a small bowl I mixed the following ingredients, which would serve as the marinade to be injected into the meat:
  • 3/4 C  Apple Juice
  • 1/2 C  Water
  • 1/2 C  Brown Sugar
  • 1/4C  Kosher Salt
  • 2 TBS Worcestershire Sauce
After whisking the ingredients together, I filled up my injector needle. You can pick one up at just about any grocery store. I purchased the one seen above at Lowe's. I injected the meat four times on each side, causing it to plump up significantly.

Once the meat was fully injected, I placed it on my grill surface and applied a dry rub. The one I used is called Jeff's Naked Rib Rub, but it works equally well on any cut of pork. You can use whatever rub you prefer. 

Indirect heat with waterpan
Then I fired up my Weber Kettle grill, setting it up for indirect heat. Now, in case you don't understand what I mean by "indirect heat," I've taken a couple photos to demonstrate what I mean. In simplest terms, it means all the charcoal on one side of the grill and a water/drip pan on the other. Once that setup was complete, I placed some soaked wood chips (pecan, in this instance) on top of the charcoal to create a light smoke while the meat cooked. You'll also notice that I opted for lump charcoal, rather than traditional Kingsford-type briquettes. 
Pecan chips on top of lump charcoal


And so, onto the grill went the pork loin. The rub I used is based largely on paprika and brown sugar, so I anticipated that it would eventually create something of a dark brown "bark." I adjusted the upper and lower vents to maintain a temperature of 300 degrees, then went in search of a beer.


Coming along nicely after an hour
 Around an hour or so later, I took a peak at the pork loin to check my progress. The dry rub was, as expected, beginning to form a nice bark and the smell from the grill was incredible! The internal temperature, however, was not high enough to consider it "done." For a pork cut such as this, 150 degrees or so is the appropriate and safe internal temperature. 


It took about another hour to reach the desired temperature. I removed the meat from the grill, wrapped it in foil, and let it rest for 20 minutes (and let me tell you, it was tough to wait that long). I sliced it and taste tested... it was delightfully moist and flavorful with a subtle sweetness. Originally, when I was deciding how to prepare this cut of meat, I had thought it would be necessary to add barbecue sauce -- not so! It was so flavorful that absolutely no sauce of any sort was necessary.

Despite the fact that I've been overly verbose in explaining the methods for preparing this dish, it's remarkably easy and I'm sure you'll have equally terrific results! Trust me, this one is worth a try.


Sunday, October 31, 2010

Barbecue Breakfast "Fattie" Roll

Sliced BBQ Breakfast "Fattie" Roll
Took a bit of a break here, lately, from writing up my cooking exploits. I needed a bit of time to experiment and come up with some new ideas. There were some good, some bad, and some ugly -- but this one, you're sure to love! 

I've made something similar to this once before for dinner, but with different ingredients inside. That's the beauty of the "fattie" roll -- you can put just about anything you want in it and it'll still taste great! This time, I woke up and decided I really wanted a good, hearty, old-school breakfast -- but grilled. I'd cook just about anything on a grill, given a choice.

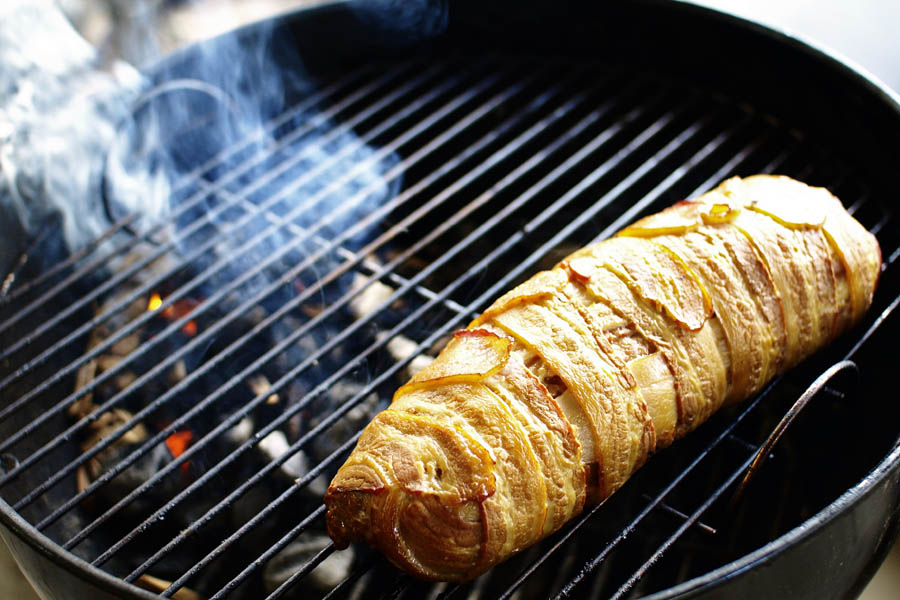
Basically, it's an omlete wrapped and rolled up in a layer of Italian sausage, then that is wrapped in thin strips of bacon. The roll is then grilled over indirect, medium heat until it reaches an internal temperature of 160 degrees and the bacon is crisped.

The prep-work for this meal is a little time consuming but well worth it. I began by dicing up a few things for the filling. I decided on Portabello mushrooms, green bell pepper, and Vidalia onion. I added a little olive oil into a shallow pan, then sauteed until the onion began to look slightly translucent. I then whisked three eggs together in a separate bowl and poured it into the pan with the other ingredients, making something similar to a fritatta. 

Meanwhile, I took about a pound of Italian sausage filling (not in a sausage casing, just the raw sausage meat) and squeezed it into a gallon-sized Ziploc bag. With a rolling pin, I flattened the meat out into a sheet until it filled the bag corner to corner. I cut away the bag along the edges and flopped the sheet of sausage meat onto a large piece of heavy-duty foil, which was pre-rubbed with Pam spray. 

Once the sausage sheet was laid out, I began putting in the filling. What I learned from previous experience is that it's usually best to only put the filling over about one third of the sausage sheet, that way it rolls easily. I added some shredded cheese over the top of my omlete/fritatta-looking filling and began rolling the sausage around it, similar to a Swiss Roll. It goes a lot more smoothly if you just use the foil to roll it up, rather than trying to manipulate the meat-sheet (it's way too soft for that).  When the roll looked about right, I then twisted up the ends of the foil around it (picture a Tootsie roll). I twisted it up tightly, helping to compress the roll a bit and making it much easier to manage for the next step.

After a few minutes in the fridge, I brought the wrapped up roll out and removed the foil. Then I took bacon and wrapped it around the roll, pinning the loose ends down with soaked toothpicks. (Thin bacon is best, as it crisps better and cooks more quickly). 

And onto the grill it went!

As you can see in the picture, all the hot coals are on the opposite side of the grill from the breakfast roll. I tossed some soaked applewood and cherrywood chips onto the coals to produce a soft, aromatic smoke. Then I closed up the grill and manipulated the vents until it held a steady temperature of 350 degrees. (You could just as easily do the same thing in an oven, just skip the wood chips).

After about an hour, I added some more wood chips and opened the vents further, kicking the temperature up to around 425 degrees. I wanted to make sure that the bacon crisped nicely, along with absorbing the sweet apple and cherry smoke. 

It took about another 45 minutes for the roll to reach its desired temperature of 160 degrees. I removed it, then loosely wrapped it in foil for about 15 minutes, letting the juices redistribute back through the roll. Then I sliced, served, and devoured. Score!


Sunday, October 10, 2010

Not-Yo-Momma's Meatloaf

Finished meatlof
A lot of people just cringe when they hear "meatloaf." Dry, flavorless, and something to avoid at all costs. I remember not wanting to eat meatloaf as a kid -- tasted like a ketchup-laden slab of dry meat, which never struck me as a huge treat. Personally, I don't think there are too many dishes that, when done properly, can't be enjoyable. So I decided to revisit meatloaf and see if I could come up with a recipe that would make it more moist, flavorful, and generally defy the preconceived notions that a lot of folks have about this dish.

I poked around the internet to find a basic meatloaf recipe to modify. Seemed pretty straight-forward, really -- very similar to putting together your own hamburger patties, except you make more of it and form it all into a loaf.

From the research I did, not many people were adding seasoning to their meatloaf. I really wanted it to be more than a bland log of meat with some peppers and onions in it. I put the basic "mandatory" ingredients into a mixing bowl and added things I thought would work well and compliment each others' flavor, then continued to tweak the recipe until it felt like the right consistency. When all was said and done, this is what I had come up with:
All put together, ready to cook
  • 1 1/2 lbs. ground beef
  • 1/2 lb. Italian-style ground pork sausage
  • 1 small onion finely chopped
  • 1/2 green bell pepper finely chopped
  • 2 cloves garlic minced (optional)
  • 1 cup   2 C. fresh bread crumbs or saltine cracker crumbs
  • 2 eggs lightly beaten
  • 1 TBS hot sauce of choice
  • 1/2 tsp cayenne pepper (optional)
  • 1 tsp Kosher salt
  • 1 tsp course-ground black pepper
  • 1 tsp Worcestershire sauce
  • 1 handful of dry steak/beef seasoning of choice (McCormicks, Mrs. Dash, Stubbs, whatever you like)
  • 1/2 C. ketchup
  • 1/2 C Barbecue sauce
  • 1/4 C milk
Once that was all mixed together nicely, I formed it into a "loaf" shape using a bread pan, then slid it out into a disposable foil roasting pan. Instead of tossing this little concoction into the oven, as is the status-quo, I opted to put it into my smoker. 

Before I go on, a few optional changes:
You could just as easily put it on a grill, if you wanted -- I just thought it would add another dimension of flavor to get a light wood smoke into the meat, complimenting the BBQ sauce I used in the recipe (a honey smokehouse-type that I made myself). And if you want to avoid the barbecue/smoker angle all together, you could add a half-bottle of "Stubb's Liquid Smoke" to the meatloaf mixture, then put it in the oven.
 So, onto the smoker it went. I guesstimated that it would take around 4 hours at 240* to be done properly. I was shooting for 165* internal temperature and decided to check it once an hour. I also decided to baste the meatloaf with a light coating of BBQ sauce and the drippings in the pan twice during the cooking process to help it keep moist and absorb even more flavor.

Sure enough, as predicted, it took just shy of four hours to reach the desired 165 degree internal temp. I took the pan off the smoker and covered the top with foil for around 15 minutes. Then I transferred it to a serving platter and sliced it up.

My first go-round trying this recipe, the meatloaf was a little loose. It fell apart a bit when I went to slice it up. I changed the amount of bread crumbs from 1 cup to 2 cups -- that caused it to hold together much better. After that minor change, the recipe came out exactly the way I had hoped it would and held together just right. It was very juicy and full of flavor. This recipe totally destroyed the negative image of meatloaf I had for so many years. Tell you what, I'm definitely making this again!